Common name: Messier 31, Andromeda Galaxy
Constellation: Andromeda
Right ascension: 00h 42m 44.3s
Declination: +41° 16′ 9″
Distance: 765 kpc (2.5 Mly)
Apparent magnitude: 3.44
Absolute magnitude: -21.5
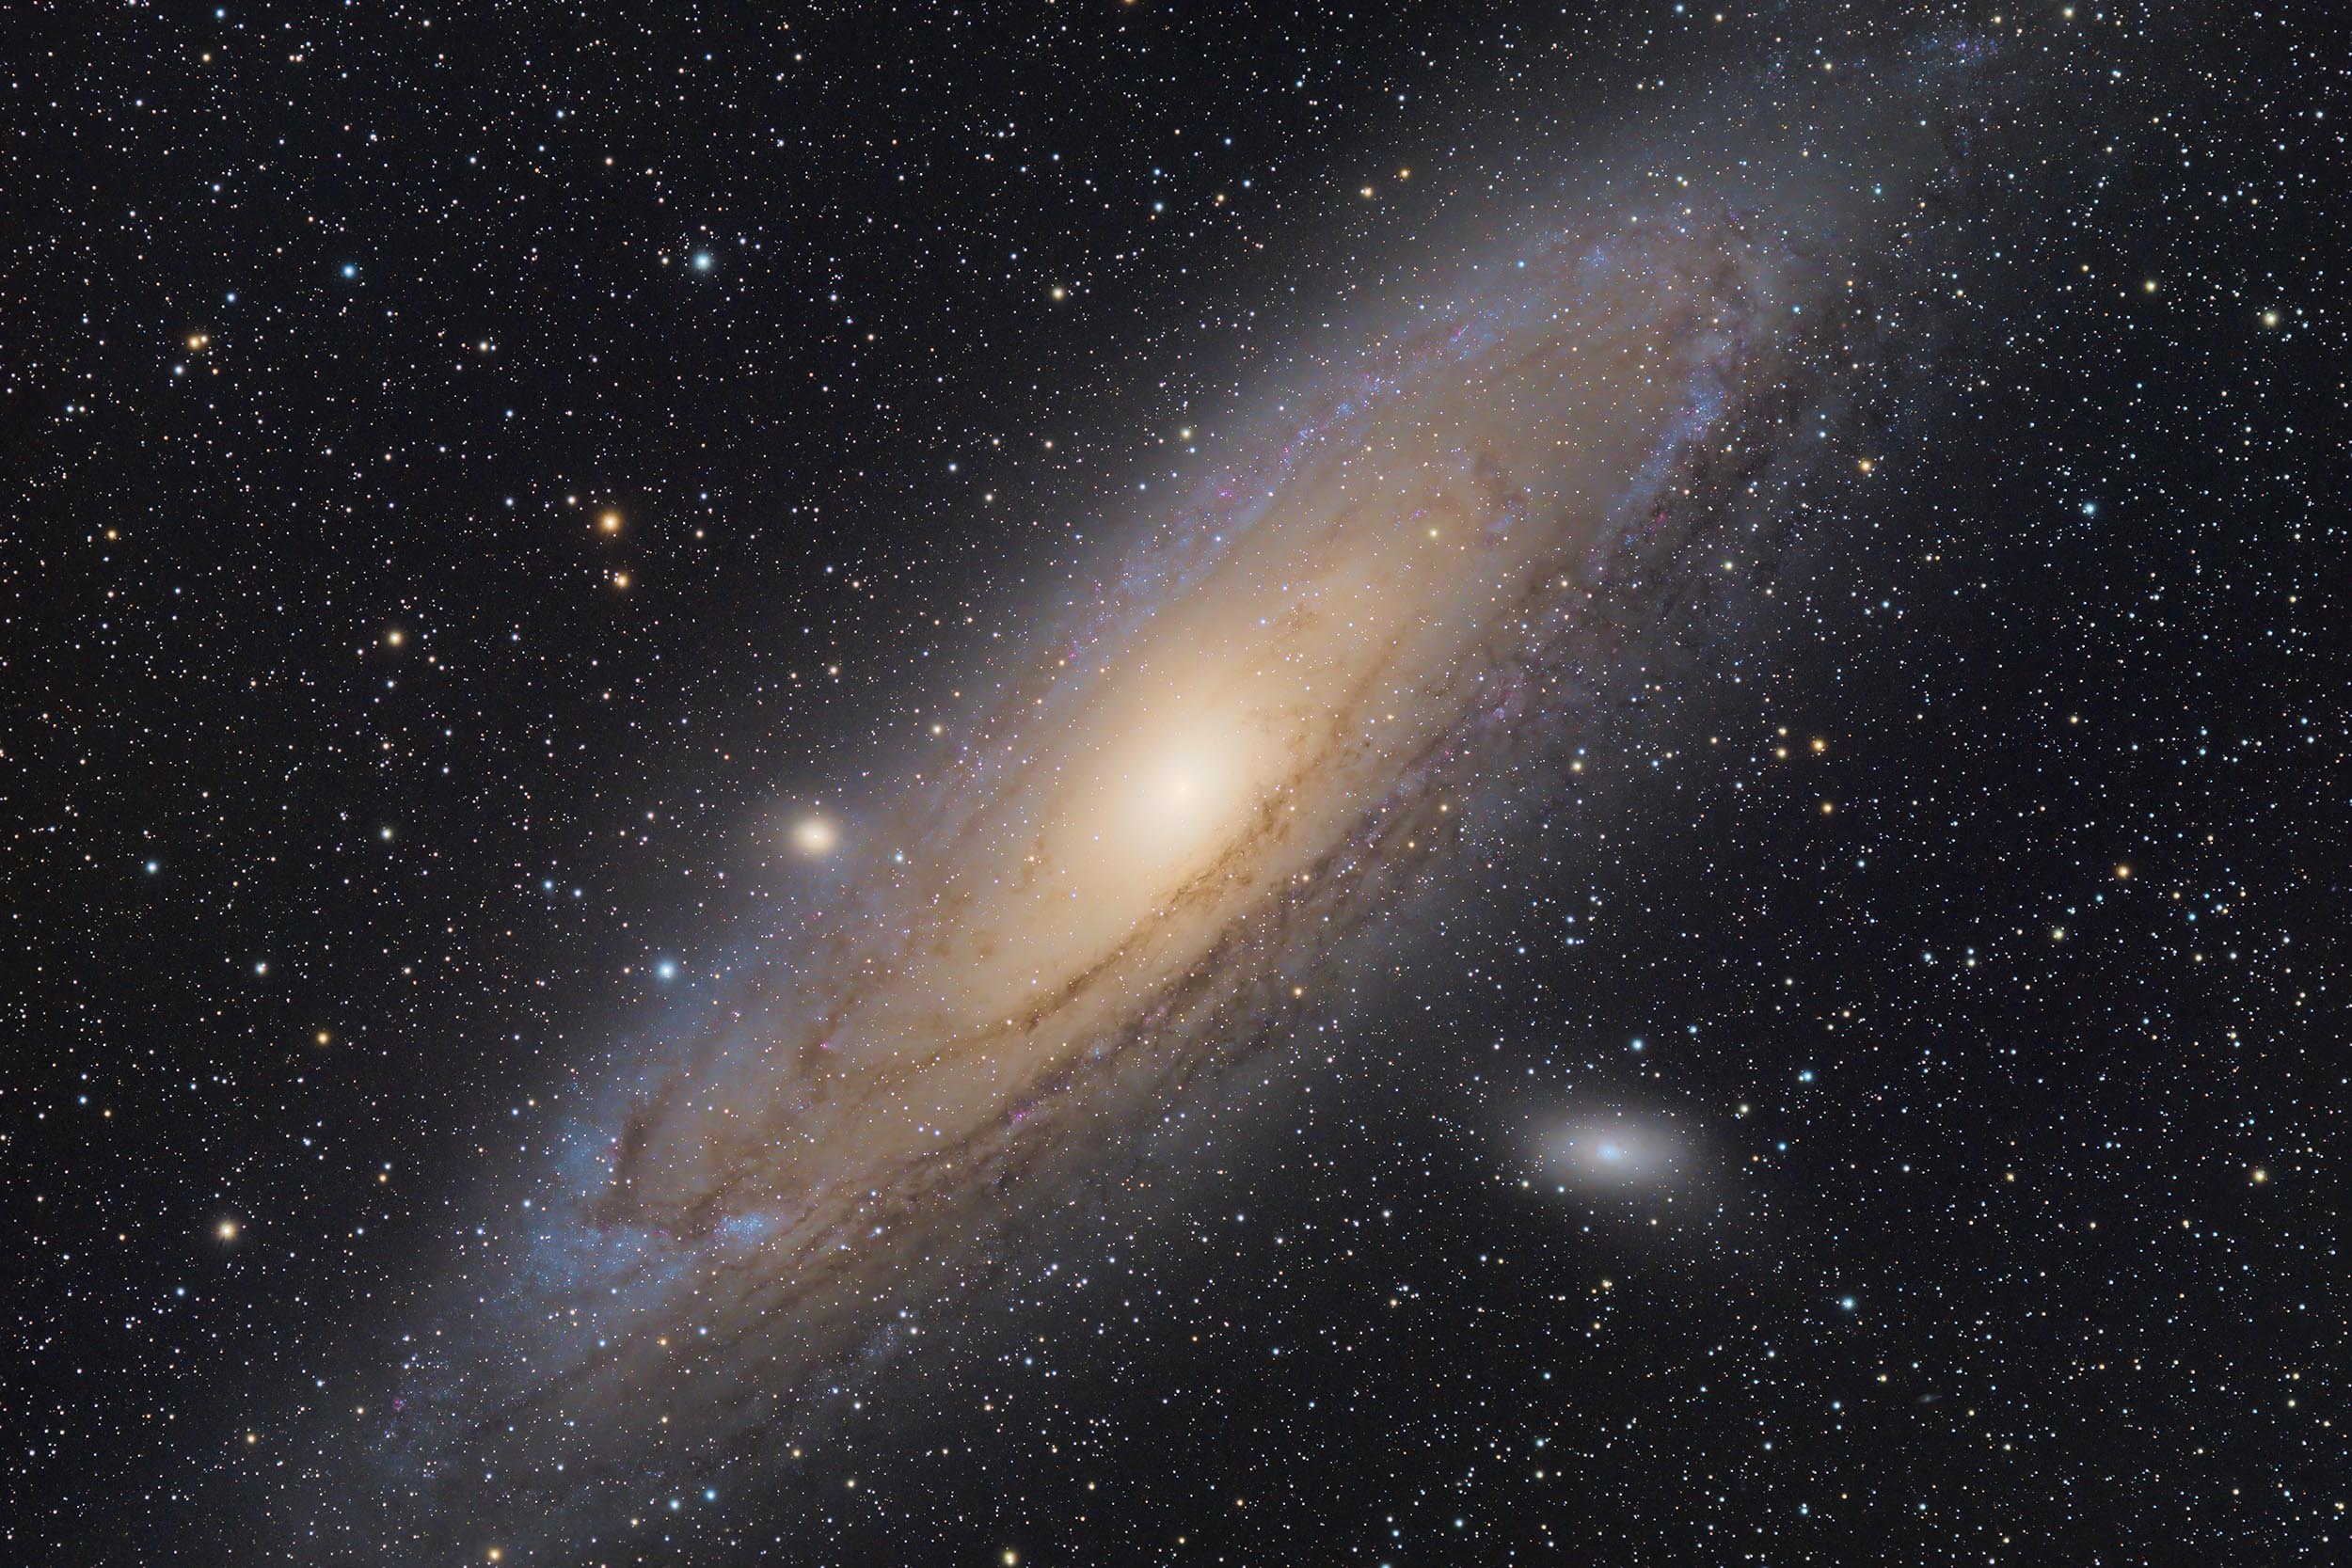
The Andromeda Galaxy M31
The Andromeda Galaxy is a barred spiral galaxy at a distance of about 2.5 million light-years and the closest spiral galaxy to the Milky Way. It’s part of the Local Galaxy group with a diameter of about 220 000 ly; it’s the largest galaxy in the group.
M31 is one of the most popular and easy targets for astrophotography on the northern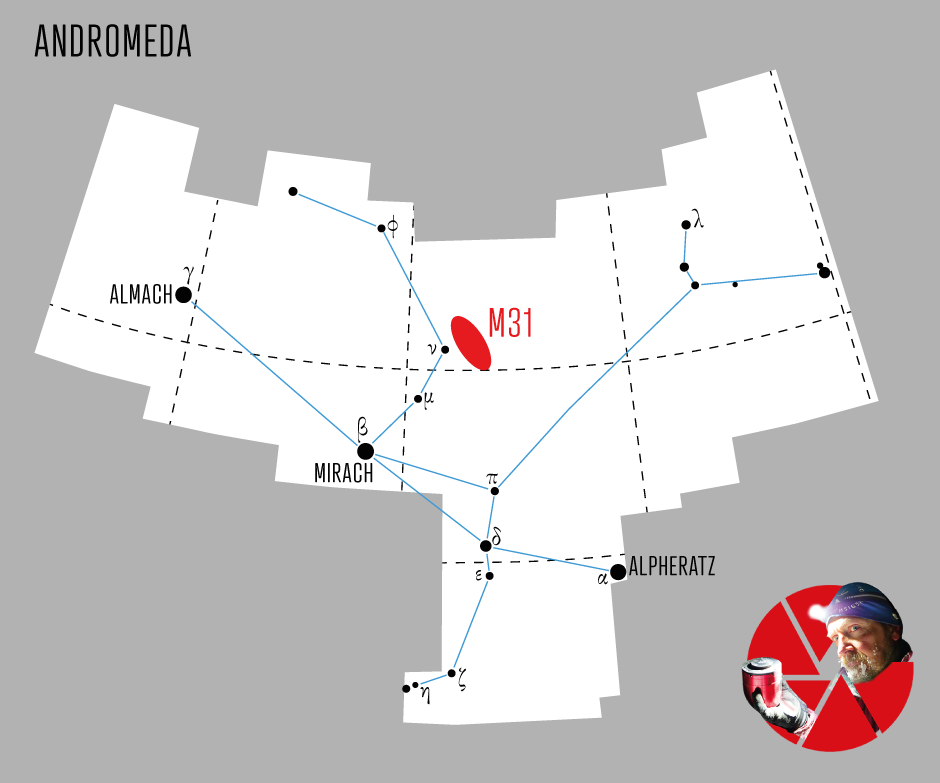 hemisphere. The Andromeda Galaxy has a large distribution in the sky, with a width of about six times that of the full moon. That means that you don’t need a long focal length of your scope. The effective focal length I used in these images is 523 mm with an APS-C-sized sensor, and the galaxy covers all of the image frame.
I collected two hour’s worth of data for this image (24×300 seconds) from a Bortle 1-2 night sky south of Muddus national park in the Arctic part of Swedish Lapland. I used the ZWO ASI 2600MC pro OSC camera at gain 100. It was a beautiful evening with a temperature around -20°C and some northern light playing around on the sky as well.
Andromeda Galaxy is a large and relatively light object. Nevertheless, there are always some challenges.
Technique and Challenges
Focus: I can not stress enough the importance of accurate focus. After the polar alignment, I point the telescope on a bright star, such as Dubhe in constellation Ursa Major or Capella in constellation Auriga, and focus manually with a bahtinov mask.
I also use a ZWO EAF with an autofocus function in the ASI AIR app that checks the focus every 30 minutes. Without the EAF, I would recommend checking the focus regularly during the session.
Guiding: With good guiding, you get nice and small stars. With bad guiding, you get larger stars and a soft image.
Dark sky: A dark sky is a very large advantage, especially when shooting with an OSC. From a Bortle 1-2 sky, you can collect a lot more high-quality light in a shorter time compared to shoot from a heavy light-polluted sky.
Post Processing: When you have collected your data, it’s time to process all files. In this version, I have stacked all light frames with dark, flat, and bias frames to create a master fits-file. I then continue to process the master file and remove gradients, calibrate star colors, and making some contrast and color adjustments before exporting to a 16-bits tiff file in ProPhotoRGB.
In the next step, I upscaled the tiff-file with the help of Topaz Gigapixel. This process removes some noise and makes the image sharper with more detail. I then make some color adjustments in Adobe Photoshop.
I increased the blue saturation in the arms and the magenta to highlight ha-areas. Then I do curve adjustment to improve both overall contrast and contrast between light- and dust areas in the galaxy.
When I feel that it’s enough, I downsample the image to the resolution I want and then add some sharpness with Topaz labs. If I intend to publish the image on the Webb, I save it as a png- och jpeg file in sRGB.
Telescope: Sky-Watcher Evostar 80ED DS-pro
Mount: Sky-Watcher EQ6-R pro
Camera: ZWO ASI 2600MC pro
Guide Scope: Sky-Watcher Evoguide 50
Guide Camera: ZWO ASI mini
Focuser: ZWO EAF
Control Unit: ZWO ASIAir pro
Integration: 2 hours (24×300 seconds)
Processing software: AstroPixelProcessor, Topaz Labs, Adobe Photoshop
Processing computer: MacBook Pro M1
Watch the session on YouTube!
Below: Some of the astrophotography locations I use in Swedish Lapland
Swedish National Space Agency Astrophotography contest 2021
A slightly different version based on this data was one of the winners in the Swedish National Space Agency astrophotography contest 2021.
In the Video below I show how I did the processing of that version in StarTools. It’s slightly different from the version I did in AstroPixelProcessor.